Thursday 1 December 2016

Charity Event: Dec 18, 2016 - Craft Night Out Holiday Wrapping Party


The holiday season is upon us, and for most, this is a time of togetherness and joy but for others, this is a time for despair.  Together, with your support, we at Craft Night Out can change that.

On Sunday, December 18th, 2016 between 1-4PM, we are hosting our annual Holiday Wrapping Party at Three Brewers restaurant in the Kanata Centrum.  We want to make wrapping gifts just as magical as it is to give them.  Participants are invited to bring their gifts to beautifully wrap them with supplies provided.  There is no charge for entry for the event, instead will be accepting donations of new toys to be delivered to Toy Mountain! Help us bring them to new heights!

This is an all ages event, so bring your whole family! Hope to see you there :)

Fay xo

Monday 17 October 2016

Holiday Cards at Craft Night Out

Handmade for the Holidays
You can recreate our designs or change it up! We'll have all the materials you see here and more! Message us for details - it will be a blast!

Make them at Craft Night Out - October 26! Visit www.stampcraftlove.com to reserve a seat!

November dates will be announced soon!!

Cheers!

Fay


Handmade for the Holidays - Westboro Edition

Holiday season is almost here.  This year, don't just tell your friends and family how much they mean to you...show them! With a custom holiday card, but by you.

Join us for Craft Night Out, and let your creative side shine!  Follow along with our step by step instructions or put your own spin on things :) We'll be demonstrating techniques, including gold foiling using the Heidi Swapp Foiling Machine! Samples of cards will be posted on our Facebook Page and Facebook Event!

There are limited spaces! So guarantee yourself a good time and reserve your spot now. Your ticket includes 10% your bill at Vittoria Trattoria's new location: Vitoria in the Village in Westboro. Go to www.stampcraftlove.com

Upcoming event on Wednesday, October 26th from 7-9 at Vittoria in the Village, 309 Richmond Rd.

Hope to see you there!

Cheers!


Sunday 21 August 2016

Craft Night Out - Ottawa's Cardmaking Party!


Hi Everyone,

Some of you have been asking me to hold more craft nights...I've currently been working with local restaurants here in Ottawa and I am proud to announce more dates! While a few of the dates are still being confirmed, the next Craft Night Out is a go!

On September 25th from 7-9 PM, you'll find me at The Savoy Brasserie in Westboro - 334 Richmond Road. Tickets are $25/person and can be purchased online through my website: www.stampcraftlove.com
 
Stay tuned for more events!

Would love to hear from you, email me at francesca@stampcraftlove.com

Hope to see you at one of my nights!

Cheers,
Fay xo

 
Craft Night Out: Ottawa's Cardmaking party!
 
This creative social event encourages guests to wine, dine, mingle and craft together at a local restaurant or bar. It is designed so that you can craft at your own pace so come relaxed and ready to party!

You will leave with your handmade greeting cards while learning a few cardmaking techniques along the way!

The $25 includes your admission to the party, handmaking greeting cards at your own pace which you can take home and learning a few cardmaking techniques along the way! Food and drinks are not included but can be purchased at the restaurant!

Just bring yourself - we've got everything else covered!

Tuesday 12 April 2016

Craft Night Out @ Hintonburg Public House May 6


Making Crafting Even MORE FUN!

Join me on May 6th to celebrate the joy of crafting! StampCraftLove presents "Craft Night Out" in Ottawa, Canada.

When I was in school, my favourite activity was Arts and Crafts. The glue stick, scissors and construction paper always got me excited.  It is no surprise that today, I still get that feeling.  I started the SCL Social Club which holds Craft Nights at the SCL Home Studio every second month.  Something about having a glass of wine in hand and good food definitely gets our creative juices flowing. Being on maternity leave with 2 little ones for me to watch during the day, leaves me itching to go out.

A recent visit to a trendy restaurant in Hintonburg made me decide to have a craft night out (You'll see a pic on my Instagram). The atmosphere and the look and feel of the Hintonburg Public House was perfect. Food and drinks are good too!

For a fun evening of crafting, reserve your spot for "Craft Night Out"! Together, we will make a set of 2 mason jar distressed flower vases. It doesn't stop there. Everyone knows that I love making greeting cards, so we'll make one of those too! Just bring your fine selves, and I'll bring everything!

Gift Idea: Buy a ticket or give the mason jars as a gift.  Perfect for Mother's Day or a birthday or just because!


Drink a little, munch a little but smile a lot!

We accept payments online and cash or e-transfer. Seats are reserved after payment is received.

Only one date has been scheduled but may add more - Contact me for details: francesca@stampcraftlove.com

Can't wait! Don't forget to Stamp.Craft. and Love.

Fay xo


Tuesday 5 April 2016

Handmade Party Decor now available from Stamp.Craft.Love!

Everyday I'm tasselin'! - just like the song from LMFAO!   I was recently asked to make a tassel garland and a flag banner for a baby shower in Toronto. I was ecstatic and immediately said yes!  I picked up most of my supplies from the Creative Bag warehouse in Toronto, Ontario. And after the first time trying it - BAM! So pretty! I could't help but share them with you all.  Price List will be posted soon!! Oh and check out this baby shower keepsake she wanted...isn't it super cute?!


It's a beautiful day today! Hope you're enjoying the sunshine :)
Don't forget to Stamp.Craft.Love.

Fay xo


A "Frozen" Winter Birthday Party

Baby It’s Cold Outside! Selena’s 3rd Birthday!

“Let it Go” seems to be the most popular three-letter phrase among kids these days. Since Selena is a big sister, she says she is Elsa and her little sister, Callie, is Anna. It was no surprise when she told me she wanted to have a “Frozen” birthday party, this year.  I had a swim party portion but family came over after to continue the celebration.

So there I was searching Pinterest for Frozen themed things for a child's birthday party everyday for weeks. I pinned a few things, but realistically, I didn’t have the time to do any of those so I decided that I’d just do a few things here and there.

These are the things I came up with:

1) INVITATION:  Blue/Turquoise and Silver Theme


This is the quick how-to:

  Take a piece of Blue Marina Mist 8.5”x11” cardstock (#119682), and cut it in half on the 8.5” side.
2  Score it at 3.25" and 8.75" marks, and fold.
3  Type the party details on the computer and print it in Black Ink using a laser jet printer on Whisper White cardstock (#100730). Run it through the Heidi Swapp Minc machine together with the reactive foil, giving it that blue foil effect. Cut it at 4 x 5.25” and glue it on the inside.
4  To close the card, create a card band by cutting a 1 inch strip of Bermuda Bay card stock (#131197) and folding it around the card. For added effect, glue a piece of silver ribbon in the centre of the strip.
5   Stamp the largest snowflake from the Flurry of Wishes Stamp Set (#139732) using Versamark (#102283), cover it with silver embossing powder (#12345) and hit it with your heatgun.  Punch it out using a 2-3/8 scallop circle punch (#118874). Add a rhinestone (#119246) in the middle of the snowflake for a little sparkle.
6  Secure the snowflake punch out over the ends of the card band.

2)  DÉCOR

I made four flag banners to put around our house.


I used the letters from the Larger than Life Stamp Set (#135382) to stamp out HAPPY BIRTHDAY, LET IT GO AND FROZEN.

In keeping with the Blue/Turquoise theme, I used blue toned pattern paper to make the flags of the banners. Each flag measured 6x6”. Using left over glittery aqua coloured ribbon left over from Christmas, I added bows here and there.

You can’t forget Elsa and Anna at a “Frozen” birthday party, so there they were standing happily at 7 feet! Bonus: Olaf was there, too!


3) MARQUEE LIGHTS


In true Heidi Swapp style, I picked up these inexpensive wooden marquee lights from Michaels.  I figured I would use these at each of her birthday parties. Seeing her name in lights was truly something!


4) CAKE and other things

I made a three-layer cake (Vanilla, Chocolate and Vanilla) and covered it in Aqua blue ombre rosettes and topped it off with a light up Elsa crown.


I had 33 loot bags to make for both boys and girls of varying ages, so I picked up different things for each child.  I don’t know how I did it, but they all fit in a small white paper bag.  I added light blue tissue paper and glued silver doilies with each of their names on the front.


I also added a few blue Christmas ornaments to tree branches and changed my curtains to sheer turquoise curtains from IKEA to add to the wintery feel.


It was a busy week leading up to the party but enjoyed every minute of party planning!!

To order some custom invitations or banners, email me Francesca@stampcraftlove.com

Enjoy the first days of Spring! Don’t forget to Stamp. Craft. Love.

Fay xo


Wednesday 23 March 2016

Fay's 1-Minute Card: Just Married / Wedding


1) Take a piece of card stock, or patterned paper and cut it to 4.25" x 11" and fold it in half to make a side folding card.

2) Take the Just Married card from the Love Story Project Life Card Collection by Becky Higgins (#135308) and glue it to the card front. You may need to trim off the access.

3) Then add your embellishments. I chose paper flowers and pearls. I also used the Gold Glitz Dazzling Details (#133755) to accent the wedding dress.

4) Using my date stamp, stamped my cousin's wedding date.

Sale-A-Bration Ends in Just One Week! (MARCH 31)


Monday 1 February 2016

Tutorial #4: Mommy & Me Valentines - Hello Life Stamp Set


Just in time for Valentine's Day!


My almost 3 year old daughter, Selena, is super eager to craft! I often find her exploring my craft room instead of playing in her play room! Today, I want to share with you this years' Valentines that we made together!


She wanted to give her friends and family a sweet card full of hearts and this is exactly what this is.  I designed this card with a mommy and her toddler in mind. Stamping is so easy that your kids can do it to!  Everything you need to make this can be found on my site: www.stampcraftlove.com

This is how we did it:

1) Using a sheet of Whisper White Thick Cardstock (140272), cut it to 3 3/4" x 5", then cut a layering piece using Basic Black (121045) down to 4" x 5 1/4"and finally, the cut the card base to 4 1/4" x 5 1/2" in Bermuda Bay (131197).

2) Take any one of the hearts from the Hello Life stamp set (137136) and mount it on Acrylic Block D (118485). Then ink it up using Melon Mambo Ink (126948).  I would do a few practice ones with your little one while showing her how it should look like. It did take us a few times....no, quite a few times for her to finally get one completely stamped.


3) When she was ready (really, when I thought she was ready) Selena stamped 5 hearts on the pre-cut Whisper White Thick cardstock.  Any pattern will do, but I chose 3 vertical hearts on the left side and then 2 on the right side. 


4) Using another heart from the Hello Life stamp set (137136), Selena inked it up using Bermuda Bay ink (131171).  She then stamped it on a scrap piece of Whisper White cardstock. 


5) I punched out the stamped heart using the Sweetheart punch (133786), but she insisted on helping me! Typical Selena! :)


6) Then Selena took the punched out heart and dipped the sides of the heart in the Bermuda Bay ink (131171) to create a border.

7) We, then, used the Heart Punch out of the Itty Bitty Accents Punch Pack (133787), to punch three hearts out of a scrap piece of Bermuda Bay cardstock.  (The picture below shows two sets of hearts for the two cards we made)


8) Mommy's turn to stamp!! Then using the "so sweet" stamp from the Hello Life stamp set, (137136) I stamped it close to the bottom but overlapping the third heart on the left.


9)  Assembly time!! We glued the stamped layer, then the middle layer (Basic Black) and the card base (Bermuda Bay) together using Fast Fuse Adhesive (129026).  Selena made sure that they were really glued together!

10) Then I put dabs of Multipurpose Liquid Glue (110755) (this stuff is amazing by the way) on the back of the small hearts and Selena placed them where ever she wanted on the front of the card.

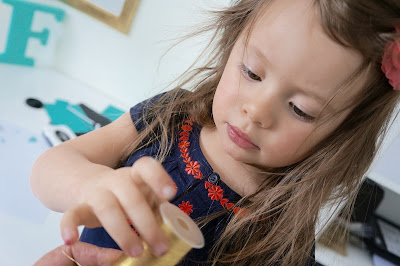
11) Then I helped her wrap Metallic Gold Thread (138401) around her hand 5 times and snipped that piece off the spool. Leaving it wrapped up, I placed it on the card front.  


12) Using Stampin' Dimensionals (104430), I adhered a few of them to the back of the larger punched out Heart and secured it on the card front overlapping the Gold Thread (138401).
.


13) We wanted to add a personal greeting, so we took a piece of Whisper White cardstock (140272) cut to 4 1/4" x 5 1/2" and wrote a little note using markers. Then, we glued it to the back of the card.

There you have it!  Our Mommy and Me Valentines.


We had so much fun doing this together!!! She even asked me if she could do it with her friends! I told her she could!! :)  and your child could too. Ask me how you could host your own kids stamping and crafting workshops - maybe, have it as an activity at their next birthday party!

Be sure to take some time to share what you do with your children, it's a great way to spend more time with them!!!


Have a great week :)  Don't forget to Stamp.Craft. and Love.

Fay xo


Thursday 28 January 2016

Tutorial #3: DIY Wall Art Using Yarn & Giveaway!!

Wall art can be so expensive! Why not make your own!!  I recently moved into a new house in August 2015 and with the birth of our 2nd daughter, Callie, we are still working on making our new house our home. Our home decor was primarily dark and bold colours like, black or red, but now I am lightening things up with whites, creams, light greys and light pink (and metallic accessories, of course).


Every time I entered my living room, I didn't get the warm and fuzzies like I imagined when moving to a new house.  It was mainly due to the fact that my walls lacked something, but I couldn't quite put my finger on it. I went searching for something soft, feminine and unique for my living room.  Then it hit me, I was at Michaels the other day and my eyes were drawn to this soft, fluffy yarn!! An image of something similar I saw online last year crossed my mind.  I decided to try it out (what I can recall from memory) - I bought yarn in grey, in white and in ombre of pink and cream.


I used a tree branch as my base, cut multiple pieces of yarn measuring approximately 40 inches.  I didn't measure it exactly as I wanted varying lengths.  Using the "cow hitch knot", I tied as many pieces of yarn to the branch that I wanted in a random colour pattern.  Then, I used a piece of white yarn and tied it to either end of the branch to serve as the hanging piece. Oh it was just perfect!!!


This was so quick, inexpensive, and matched my decor.  Bonus: it was handmade by me!

I hope you liked this idea.  Use it for your bedroom or nursery. If you try it, send me a pic I would love to see it :)

GIVEAWAY ALERT:  I made a second one of these and would love to give it away to one of you special people. Enter for your chance to win this Yarn Wall Art. Winner will be announced on the Facebook page and on my blog on Friday, Feb 5, 2016.

Rules to Enter:  You must complete all 3 steps!

1) Leave a comment on this post
2) Subscribe to my blog by entering your email (top right hand corner of my blog page)
3) Like my Stamp Craft Love Facebook Page

If you have already subscribed to my blog and have liked the Facebook page, then all you need do is leave a comment!

Hope you are all having a great day!

Don't forget to Stamp. Craft. and Love.

Fay xo